1 GitHub
博主已经写好了一份瀑布流的框架,如果你想直接使用,可以点击进入CFWaterFlowView的项目主页。
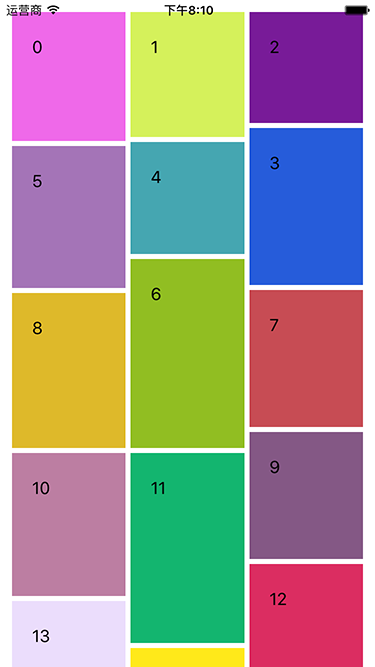
CFWaterFlowView是博主已经封装好的瀑布流框架,轻量级、简单、易用,希望你喜欢。
2 简介
瀑布流是一种非常常用的UI布局,可以为用户带来沉浸式的体验,不需要打断用户的阅读。非常适合带图片信息的展示。

3 思路与实现
3.1 选择什么作为基类
-> 首先你要想到这个能滚动的布局一定是通过UIScrollView实现的
-> 那么现在有三种选择
- 通过UITableView实现
- 通过UICollectionView实现
- 通过UIScrollView实现
-> 但是UITableView只能实现每行一个cell,而UICollectionView的每个cell的大小又是相同的
-> 那么最后选择通过最基础的UIScrollView实现瀑布流
3.2 如何提供更好的接口
一般来说,为了使你提供的API更易用,可以参考官方是如何构建自己的类的。
既然瀑布流是通过UIScrollView实现的,又类似于UITableView,有cell的概念,那么久可以参考UITableView的API
所以你需要:
- 定义瀑布流数据源协议
CFWaterFlowViewDataSource
- 定义瀑布流代理协议
CFWaterFlowViewDelegate
- 定义并实现realoadData方法
仿照UITableView做好数据源和代理协议
1
2
3
4
5
6
7
8
9
10
11
12
13
14
15
16
17
18
19
20
21
22
23
24
25
26
27
28
29
30
31
32
| #pragma mark - ========================代理定义=======================
@protocol CFWaterFlowViewDelegate <UIScrollViewDelegate>
@optional
- (CGFloat)waterFlowView:(CFWaterFlowView *)waterFlowView heightAtIndex:(NSUInteger)index;
- (void)waterFlowView:(CFWaterFlowView *)waterFlowView didSelectCellAtIndex:(NSUInteger)index;
- (CGFloat)waterFlowView:(CFWaterFlowView *)waterFlowView marginForType:(CFWaterFlowViewMarginType)type;
@end
|
1
2
3
4
5
6
7
8
9
10
11
12
13
14
15
16
17
18
19
20
21
22
23
24
25
26
27
28
29
30
31
32
33
34
| #pragma mark - ========================数据源定义========================
@class CFWaterFlowView;
@protocol CFWaterFlowViewDataSource <NSObject>
@required
- (NSUInteger)numberOfCellsInWaterFlowView:(CFWaterFlowView *)waterFlowView;
- (CFWaterFlowViewCell *)waterFlowView:(CFWaterFlowView *)waterFlowView cellAtIndex:(NSUInteger)index;
@optional
- (NSUInteger)numberOfColumnsInWaterFlowView:(CFWaterFlowView *)waterFlowView;
@end
|
需要注意的是数据源协议中比UITableViewDataSource多出一个方法
1
2
3
4
5
6
7
8
9
10
11
| @optional
- (NSUInteger)numberOfColumnsInWaterFlowView:(CFWaterFlowView *)waterFlowView;
@end
|
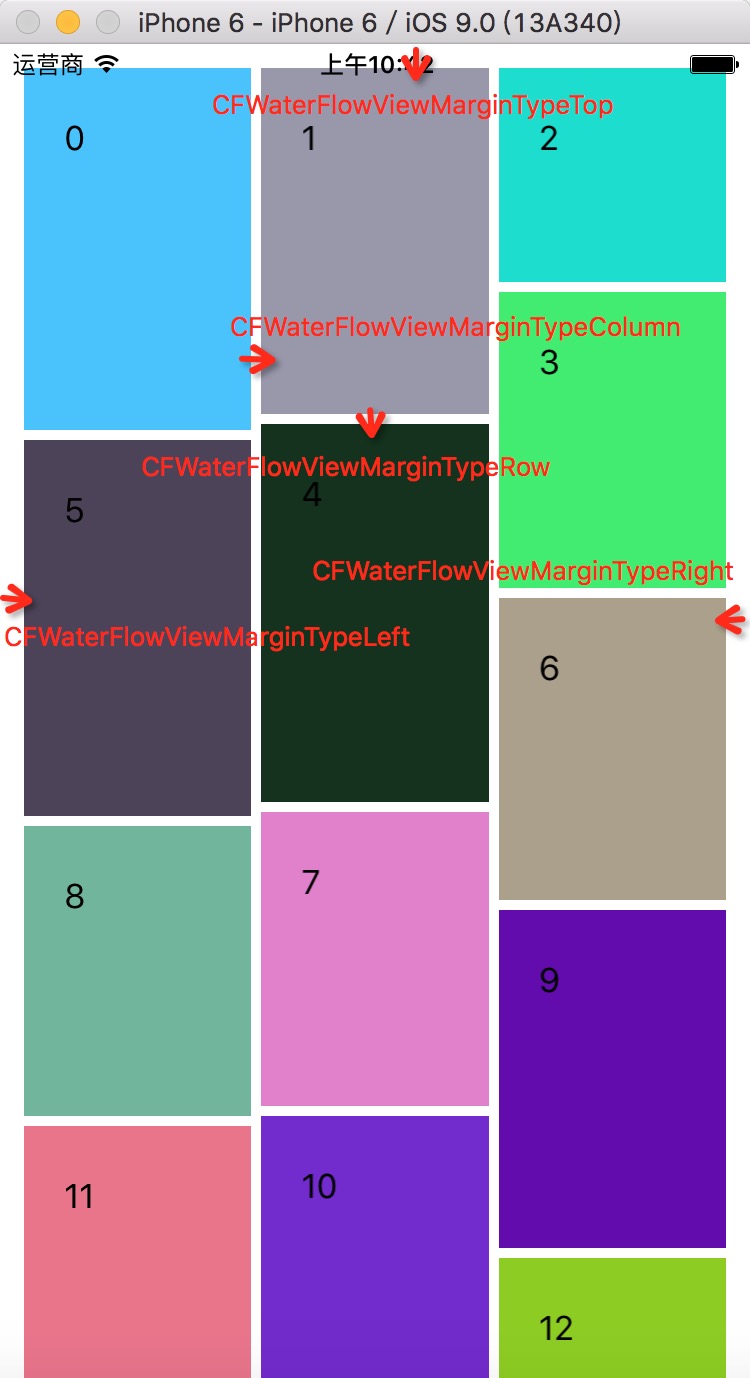
通过这个方法可以向数据源索取各种类型的间距,间距类型是一个枚举类型,定义如下:
1
2
3
4
5
6
7
8
9
10
11
| #pragma mark - ========================枚举定义========================
typedef enum {
CFWaterFlowViewMarginTypeTop,
CFWaterFlowViewMarginTypeBottom,
CFWaterFlowViewMarginTypeLeft,
CFWaterFlowViewMarginTypeRight,
CFWaterFlowViewMarginTypeColumn,
CFWaterFlowViewMarginTypeRow
} CFWaterFlowViewMarginType;
|
定义reloadData方法和代理、数据源引用
1
2
3
4
5
6
7
8
9
10
11
12
13
14
15
16
17
18
19
| #pragma mark - ========================类定义=======================
@interface CFWaterFlowView : UIScrollView
@property (nonatomic, weak) id<CFWaterFlowViewDataSource> dataSource;
@property (nonatomic, weak) id<CFWaterFlowViewDelegate> delegate;
- (void)reloadData;
@end
|
3.3 reloadData中应该做什么
reloadData中我们需要:
- 计算每一个cell的尺寸位置,并存放到一个数组
@property (nonatomic, strong) NSMutableArray *cellFrames;中
- 设置contentSize使CFWaterFlowView能够滚动
为了计算每一个cell的frame需要获得:
- cell总数
- 瀑布流列数
- 各个类型的边距
- 每个cell的高度
因为代理方法并不是强制实现的,所以我们要设定几个默认值,避免在代理没有实现定义的方法时瀑布流能够正常显示:
1
2
3
4
5
6
|
#define CFWaterFlowViewDefaultCellH 50
#define CFWaterFlowViewDefaultColumnsCount 3
#define CFWaterFlowViewDefaultMargin 10
|
3.4 reloadData的实现
1
2
3
4
5
6
7
8
9
10
11
12
13
14
15
16
17
18
19
20
21
22
23
24
25
26
27
28
29
30
31
32
33
34
35
36
37
38
39
40
41
42
43
44
45
46
47
48
49
50
51
52
53
54
55
56
57
58
59
60
61
62
63
64
65
| - (void)reloadData {
NSUInteger cellsCount = [self.dataSource numberOfCellsInWaterFlowView:self];
NSUInteger columnsCount = [self numberOfColumns];
CGFloat marginTop = [self marginForType:CFWaterFlowViewMarginTypeTop];
CGFloat marginBottom = [self marginForType:CFWaterFlowViewMarginTypeBottom];
CGFloat marginLeft = [self marginForType:CFWaterFlowViewMarginTypeLeft];
CGFloat marginRight = [self marginForType:CFWaterFlowViewMarginTypeRight];
CGFloat marginRow = [self marginForType:CFWaterFlowViewMarginTypeRow];
CGFloat marginColumn = [self marginForType:CFWaterFlowViewMarginTypeColumn];
CGFloat cellW = (self.width - marginLeft - marginRight - (columnsCount - 1) * marginColumn) / columnsCount;
CGFloat maxYOfColumns[columnsCount];
for (int i = 0; i < columnsCount; i++) {
maxYOfColumns[i] = 0.0;
}
for (int i = 0; i < cellsCount; i++) {
NSUInteger cellColumn = 0;
NSUInteger maxYOfColumn = maxYOfColumns[cellColumn];
for (int j = 0; j < columnsCount; j++) {
if (maxYOfColumns[j] < maxYOfColumn) {
cellColumn = j;
maxYOfColumn = maxYOfColumns[j];
}
}
CGFloat cellH = [self heightAtIndex:i];
CGFloat cellX = marginLeft + cellColumn * (cellW + marginColumn);
CGFloat cellY = 0;
if (maxYOfColumn == 0.0) {
cellY = marginTop;
} else {
cellY = maxYOfColumn + marginRow;
}
CGRect cellFrame = CGRectMake(cellX, cellY, cellW, cellH);
[self.cellFrames addObject:[NSValue valueWithCGRect:cellFrame]];
maxYOfColumns[cellColumn] = CGRectGetMaxY(cellFrame);
}
CGFloat contentH = maxYOfColumns[0];
for (int i = 0; i < columnsCount; i++) {
if (maxYOfColumns[i] > contentH) {
contentH = maxYOfColumns[i];
}
}
contentH += marginBottom;
self.contentSize = CGSizeMake(0, contentH);
}
|
4 缓存池实现
4.1 内存浪费(1)
在上一步骤中,计算了每个cell的frame,但是并没有予以显示,那么如何显示呢?
最简单的方法当然是:计算好frame -> 新建一个CFWaterFlowViewCell -> 的frame -> 添加到CFWaterFlowView上
但这显然会造成性能问题:因为处在屏幕之外的cell不需要显示,如果过早创建cell对象,会造成大量的内存浪费
正确的这做法是:先判断cell是否在屏幕显示范围内
- 如果在:创建cell对象 -> 设置frame -> 显示到CFWaterFlowView上
- 如果不在:暂时不做操作
按照以上思想,可以开始实现显示cell。
那么在什么时候可以[self addSubview:cell]呢?
-> 经过上面的分析reloadData中只应该计算每一个cell的frame,不能马上添加。
-> 进一步考虑UIScrollView特性,UIScrollView可以滚动,每次滚动都应该判断当前有哪些cell在屏幕范围内,并予以显示。所以可以考虑在UIScrollView滚动的时候判断、添加cell。
-> UIScrollView在滚动时会调用- (void)layoutSubviews方法,所已在layoutSubviews中对cell进行布局最合适。
4.2 解决内存浪费(1)代码实现:
- 首先编写一个方法,能够判断一个frame是否在当前屏幕显示范围内
1
2
3
4
5
6
7
8
9
10
11
|
- (BOOL)isInScreen:(CGRect)frame {
return (CGRectGetMaxY(frame) > self.contentOffset.y) && (CGRectGetMinY(frame) < self.contentOffset.y + self.height);
}
|
- 实现
layoutSubviews方法
1
2
3
4
5
6
7
8
9
10
11
12
13
14
15
16
17
18
19
20
21
22
23
| - (void)layoutSubviews {
NSUInteger cellsCount = self.cellFrames.count;
for (int i = 0; i < cellsCount; i++) {
CGRect cellFrame = [self.cellFrames[i] CGRectValue];
CFWaterFlowViewCell *cell = self.displayingCells[@(i)];
if ([self isInScreen:cellFrame]) {
if (cell == nil) {
cell = [self.dataSource waterFlowView:self cellAtIndex:i];
cell.frame = cellFrame;
[self addSubview:cell];
}
} else {
if (cell != nil) {
[cell removeFromSuperview];
}
}
}
}
|
4.3 内存浪费(2)
上一步骤我们实现了按需求添加cell,但是layoutSubviews会在CFWaterFlowView滚动时候不断的调用(哪怕只有微小的滚动),这样会导致cell被疯狂的重复添加。
-> 为了解决这一问题,我们需要保证在cell从未添加到CFWaterFlowView时才执行[self addSubview:cell]
-> 为此我们需要设立一个属性保存已经添加到CFWaterFlowView的cell,为了避免重复,使用一个Dictionary@property (nonatomic, strong) NSMutableDictionary *displayingCells;来保存,key值为cell的索引(index)
-> 如果在添加前检索到已经有对应索引cell在Dictionary中,就不再重复添加
-> 更改layoutSubviews代码
1
2
3
4
5
6
7
8
9
10
11
12
13
14
15
16
17
18
19
20
21
22
23
24
25
26
| - (void)layoutSubviews {
NSUInteger cellsCount = self.cellFrames.count;
for (int i = 0; i < cellsCount; i++) {
CGRect cellFrame = [self.cellFrames[i] CGRectValue];
CFWaterFlowViewCell *cell = self.displayingCells[@(i)];
if ([self isInScreen:cellFrame]) {
if (cell == nil) {
cell = [self.dataSource waterFlowView:self cellAtIndex:i];
cell.frame = cellFrame;
[self addSubview:cell];
self.displayingCells[@(i)] = cell;
}
} else {
if (cell != nil) {
[cell removeFromSuperview];
[self.displayingCells removeObjectForKey:@(i)];
}
}
}
}
|
4.4 缓存池
按照一个步骤,能对性能做了一些优化,但仍然再存在问题:没有类似UITableView的cell缓存池功能,并提供接口让用户能够使用缓存池中的cell
`
对于缓存池,我们很容易想到用一个Set来作为缓存池。
建立属性@property (nonatomic, strong) NSMutableSet *reusableCells;作为缓存池
仿照UITableView,定义并实现缓存池方法`- (CFWaterFlowViewCell )dequeueReusableCellWithIdentifier:(NSString )identifier;
在dequeueReusableCellWithIdentifier方法中我们需要:
- 遍历缓存池,检索符合
(NSString *)identifier的cell
- 如果检索到,从缓存池中移除该cell -> 返回该cell
- 如果没有检索到,返回nil
4.5 缓存池代码实现
1
2
3
4
5
6
7
8
9
10
11
12
13
14
15
16
17
18
19
20
21
22
|
- (CFWaterFlowViewCell *)dequeueReusableCellWithIdentifier:(NSString *)identifier {
__block CFWaterFlowViewCell *reusableCell = nil;
[self.reusableCells enumerateObjectsUsingBlock:^(CFWaterFlowViewCell *cell, BOOL * stop) {
if ([cell.identifier isEqualToString:identifier]) {
reusableCell = cell;
*stop = YES;
}
}];
if (reusableCell != nil) {
[self.reusableCells removeObject:reusableCell];
}
return reusableCell;
}
|
5 反馈
以上已经完成了瀑布流框架的完整实现
如果你需要直接使用该框架,访问GitHub项目地址:https://github.com/summertian4/iOS-CFWaterFlowView
希望你能够喜欢本套框架以及博主这个萌萌哒大四女程序员^_^
如果有什么修改建议,可以发送邮件到lotty.lingyu@gmail.com,也欢迎到我的博客
有什么问题都可以在博文后面留言,或者微博上私信我。
博主是 iOS 妹子一枚。
希望大家一起进步。
我的微博:Lotty周小鱼